Home
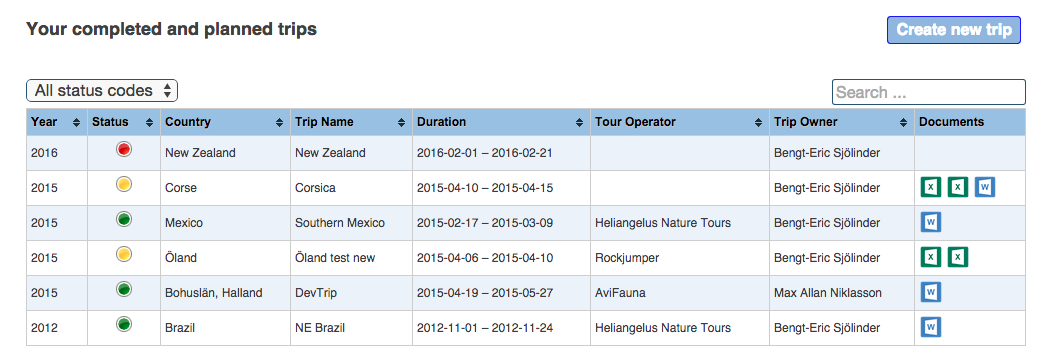
Trips is made up of 4 workflow steps for each created Trip:
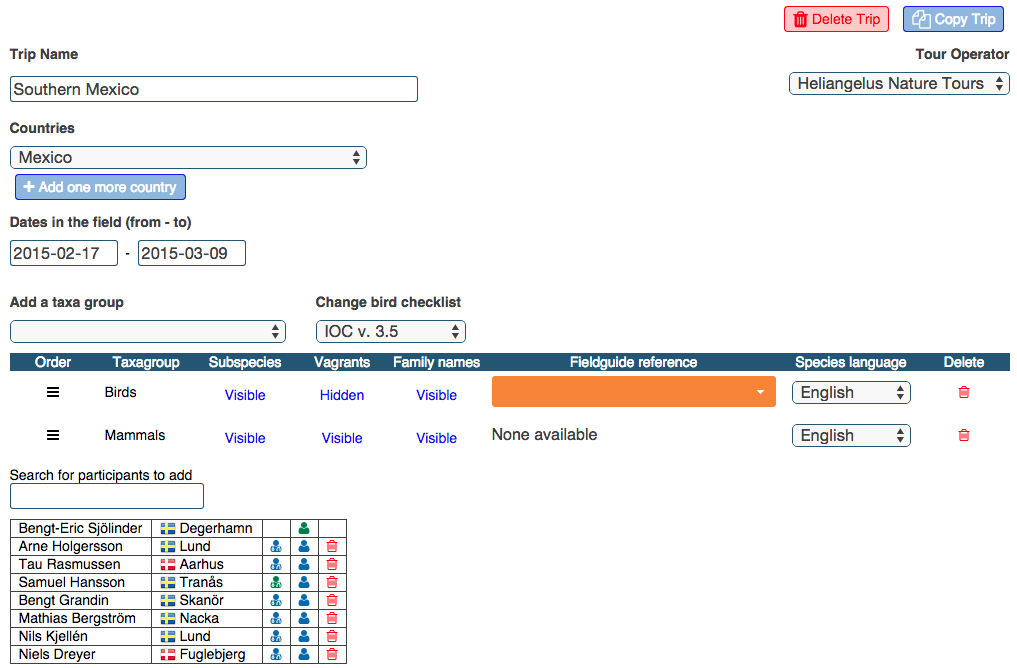
- Under Settings key data such as dates, country, species groups and participants is entered.
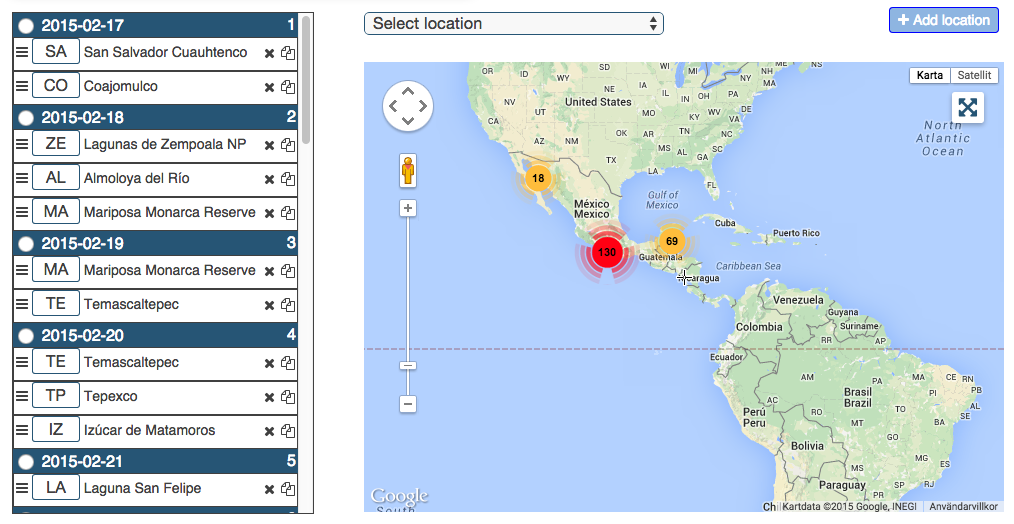
- Creation of the specific Itinerary for the trip based on geocoded locations.
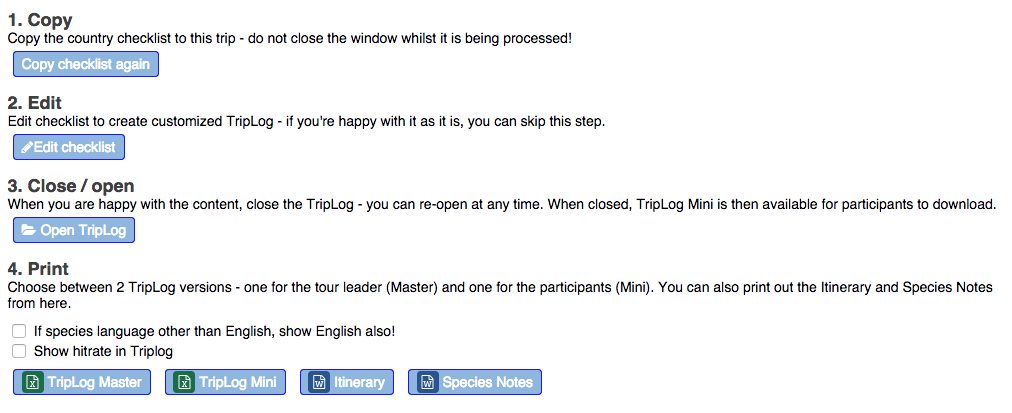
- In TripLog you define the exact content of your checklist and create a print-out.
- In TripReport you import/synchronize from excel or our iPad native app (available from AppStore) to generate the annotated checklist.
When step 4 is completed,
- the annotated checklist is available in .doc and can be attached to a diary to create the official trip report
- trip participants who are iGoTerra standard or premium members can copy observations to their personal checklists
Settings
Standard settings include trip name, country(-ies) and dates in the field but also taxa groups, the choice of IOC or Clements for the bird checklist, whether you want to include subspecies, vagrants or family names in the checklist and also assigne a Field Guide (if available).
You can also add iGoTerra members as participants and make one or a few of them your co-admin for the trip to spread the workload.
Itinerary
The purpose of the Itinerary workflow is to allow the build-up of geo-coded observations for the Tour operator but also provide the possibility to include full details of observations in the annotated checklist. The workflow consists of two steps:
- Select geo-coded locations to be visited during the trip - either from already existing locations or by creating new ones using the map
- Adding them to your itinerary - drag-and-drop your selected locations to the corresponding day/date of your itinerary and assign a 1 or 2-digit uppercase code to be used when Taking notes (see below)
You can change and modify your input at anytime - even after the trip. Clicking on the Full screen Map icon will give a zoom-in view (can be printed as well) with the locations to be visited and their sequence.
TripLog
The TripLog workflow delivers the checklist for the trip. Once the TripLog is finalized, a participant can generate his own personalized version including markers for already observed species.
Edit TripLog
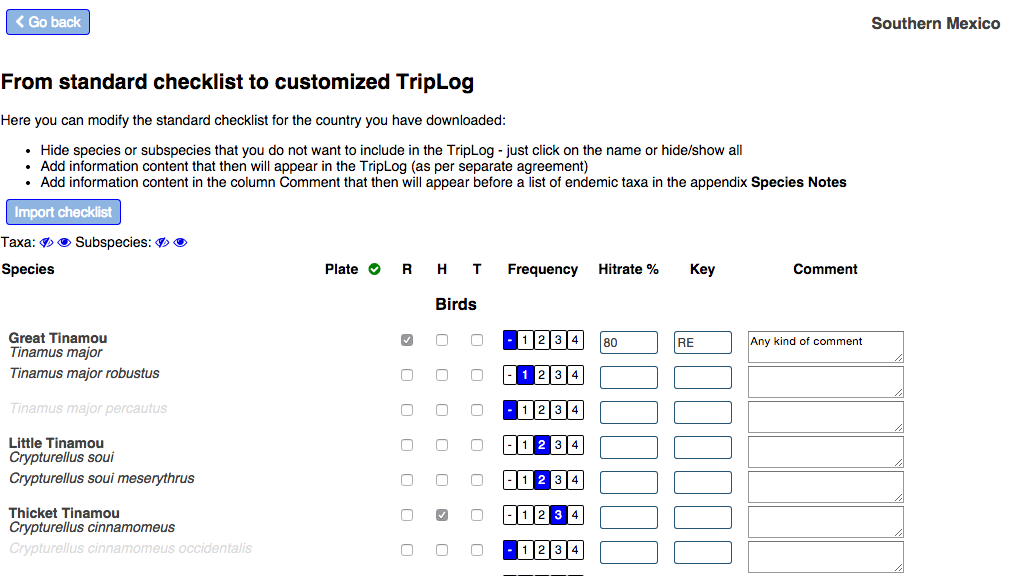
After copying the checklist for the area to the trip, the tour leader/co-admin has access to the Edit function that gives the opportunity to:
- determine which species/subspecies to include (the default is the full list for the country and as per your choice in Settings)
- to provide additional information on species/subspecies level as defined/agreed (will show in the TripLog)
- to write comments on species/subspecies level (will appear in the Species Notes)
When editing is completed, the tour leader/co-admin can close the TripLog. The following documents then become available:
- TripLog Master - tour leader / co-admin only
- TripLog Participant - generic or personalized version
- Itinerary Map (as defined/agreed)
- Species Notes - includes Comments (from Edit) and a list of endemic taxa
Taking down notes
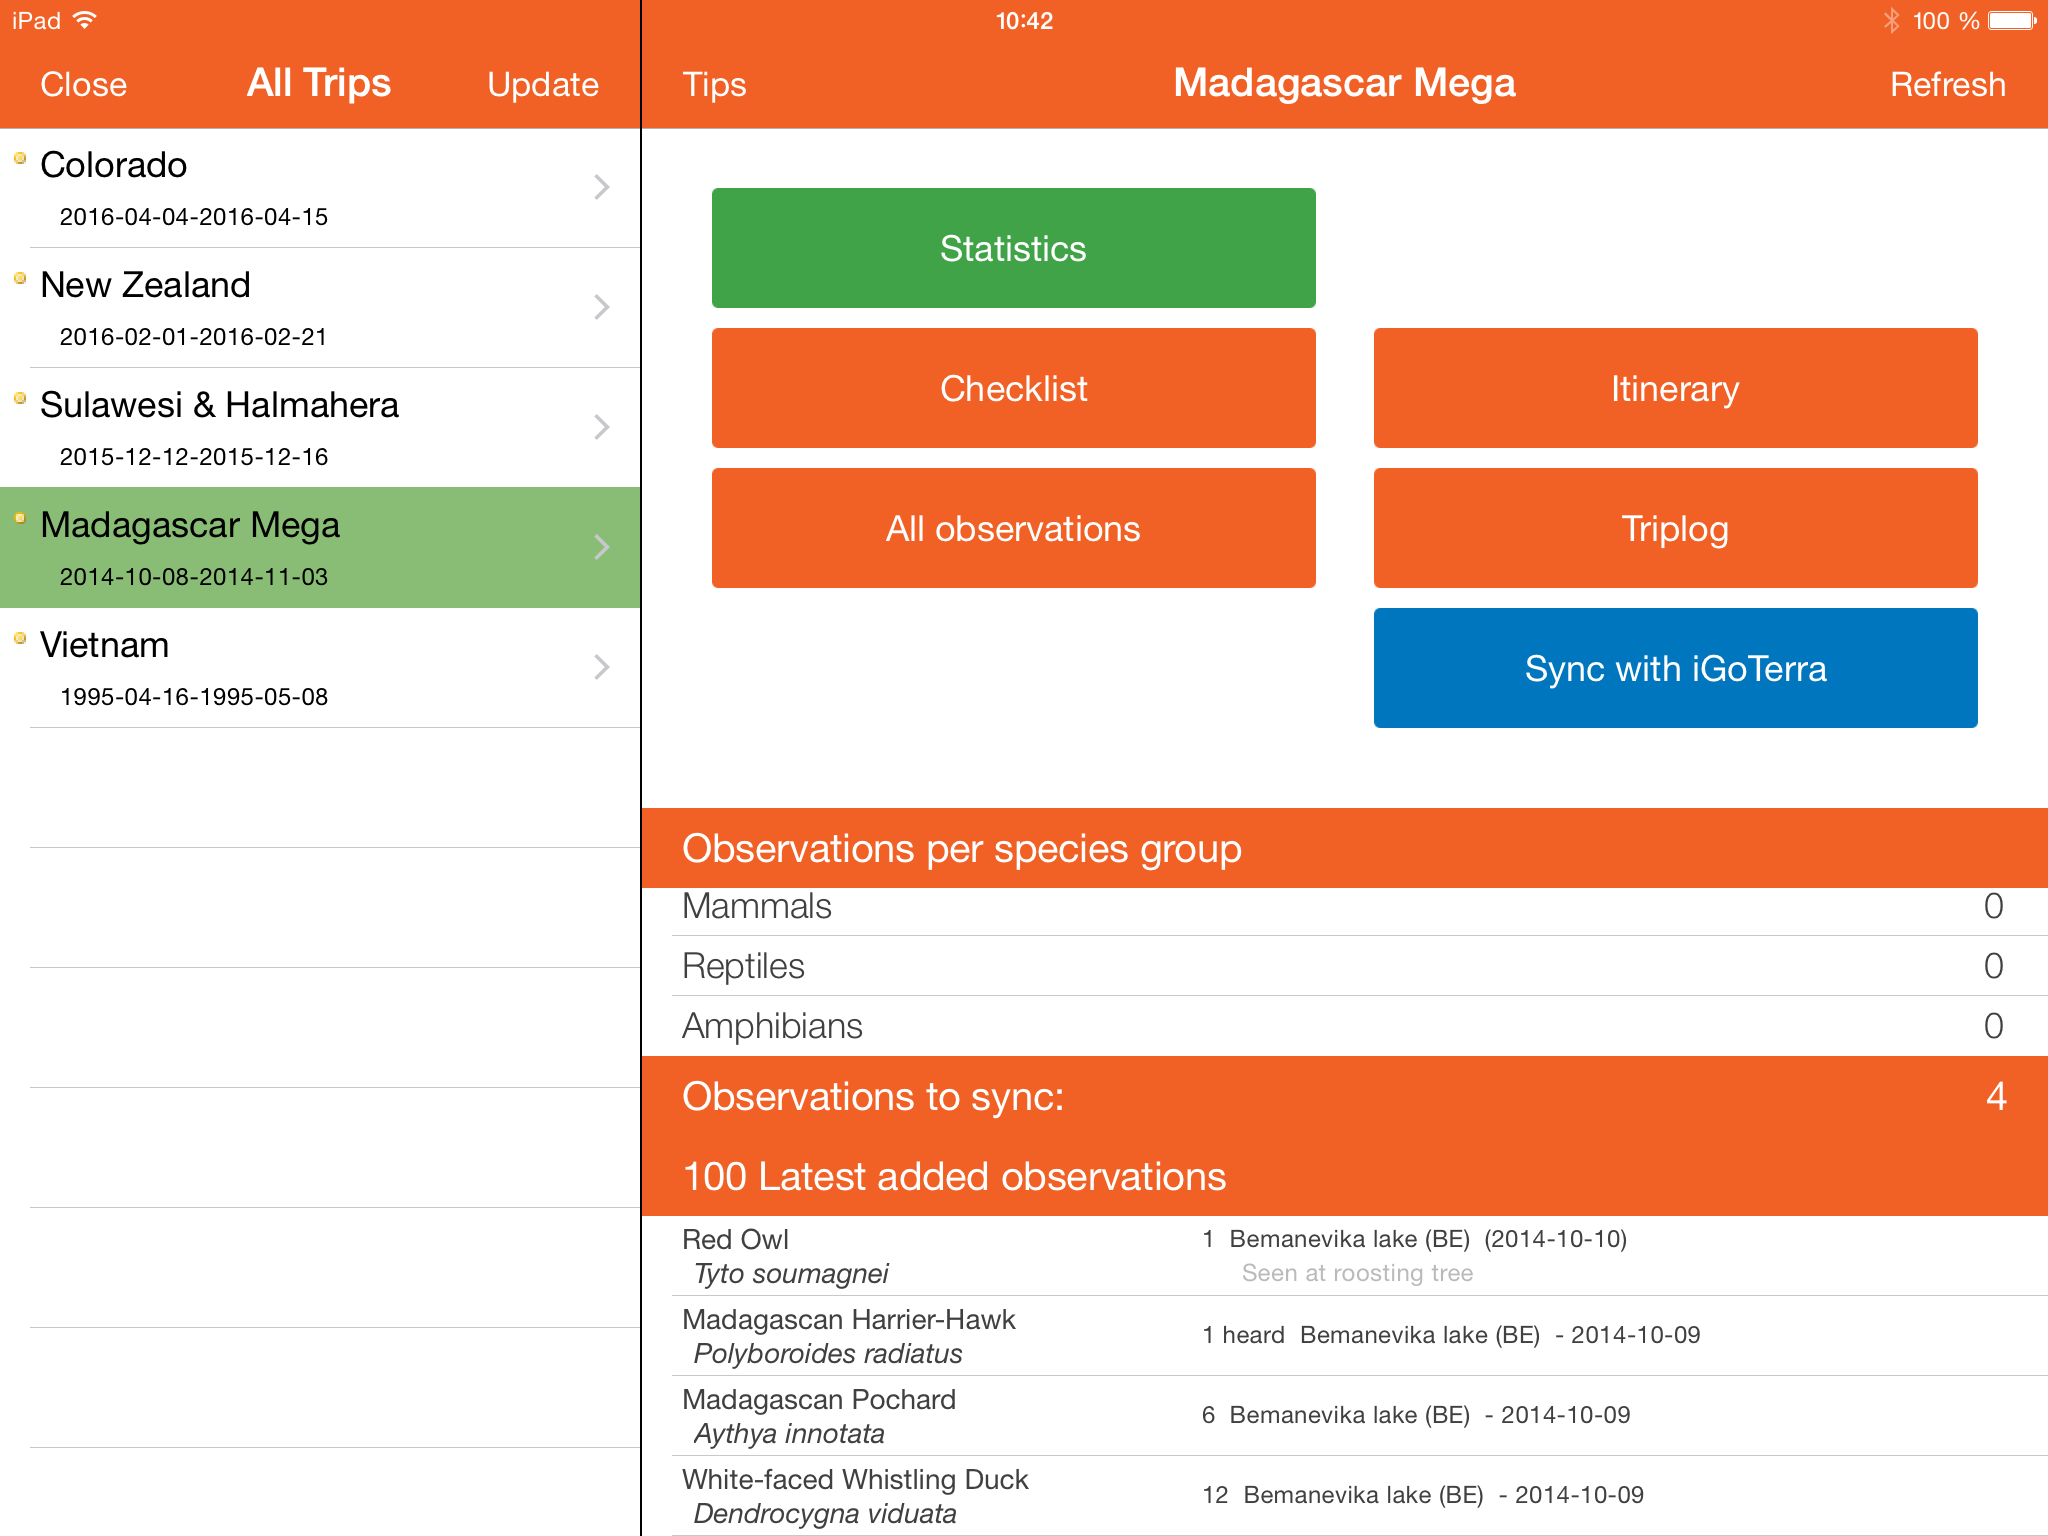
During the daily review of species noted during the day, it is recommended to make the notes directly in excel on a laptop or on an iPad using our native app iGoTerra Trips. It is of course possible to make the notes on paper and then key in the information afterwards.
Taking down notes on an iPad
Using our app iGoTerra Trips provides additional administrative benefits (available NOW from AppStore). When you have wifi access simply download the TripLog to iGoTerra Trips. Taking down notes is done offline and when you have wifi access you can synchronize observations with the website. Instructions on usage are included in the app.
Taking down notes in Excel
The process is easy and follows a handful of simple coding rules described to the right - it is IMPORTANT though to follow these rules "by-the-book" to minimize need for adjustments. Please take 5 minutes to read the below:
A. Quantity:
(i) A number prior to a location code means seen/observed (10F), a number after means heard only (F2) and 1F2 means 1 seen and 2 heard at location F - it is recommended to separate seen and heard only for more scarce and hard to see species (for most species it is adequate to have e.g. 10F as a "total" observed number including both seen and heard)
(ii) Instead of numbers the following codes can be used in combination with a location code: §=fairly common, §§=common and §§§=abundant (§§F)
B. Locations (Upper case):
(i) If two locations during the day, observations are separated by a comma: e.g 2A,B1 means 2 seen at location A and 1 heard at location B.
(ii) Code E means noted whilst travelling en route and X means noted during the day - both E and X are "non-defined" location (no coordinates).
(iii) If a species is common and/or widespread during the whole trip and therefore there is little interest to make detailed notes on quantity and locations, the tour leader/co-admin can determine to use X (with or without any quantity) in combination with detailed observations; detailed observations will be displayed in the TripReport followed by the following information: Observed on x days in total.
(iv) If an observation is deemed not to be fully confirmed but still desirable to have in the TripReport as Unconfirmed, mark this as follows: *1F* (it will be included in the TripReport as Unconfirmed)
C. Age and sex codes (lower case):
(i) Gender: m=male, f=female, p=pair (e.g. 1fM)
(ii) Age: a=adult, s=subadult, i=immature, j=juvenile (e.g. 1aM, 3afM)
You can also add Comments (column I) on species level that will be uploaded together with the observations - it could either be comments that you want to included in your annotated report or internal follow-up notes.
TripReport
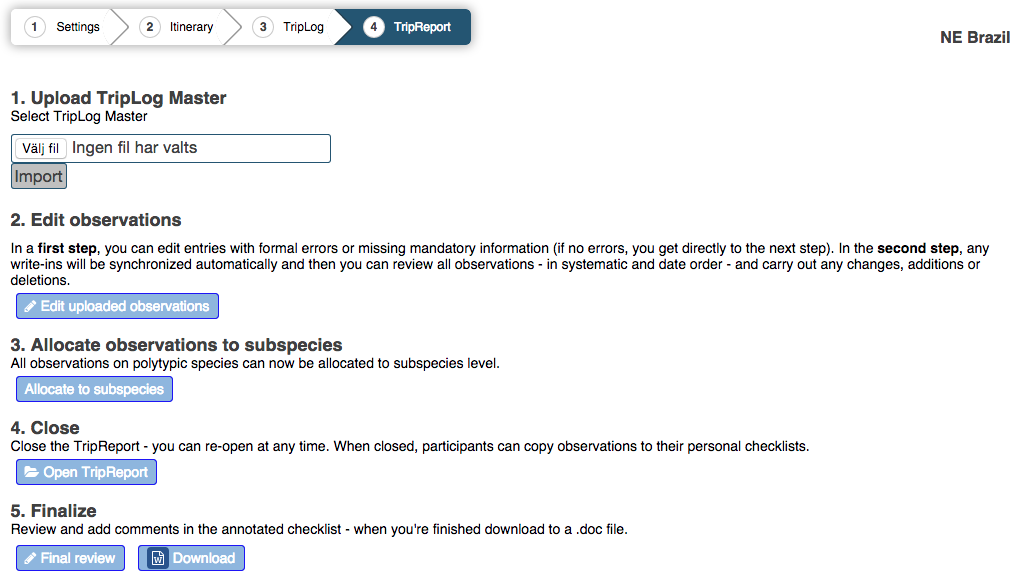
The TripReport workflow creates the systematic list of species/subspecies observed during the trip based on the notes done during the trip - after uploading the excel file or synchronizing from iGoTerra Trips:
Edit TripReport
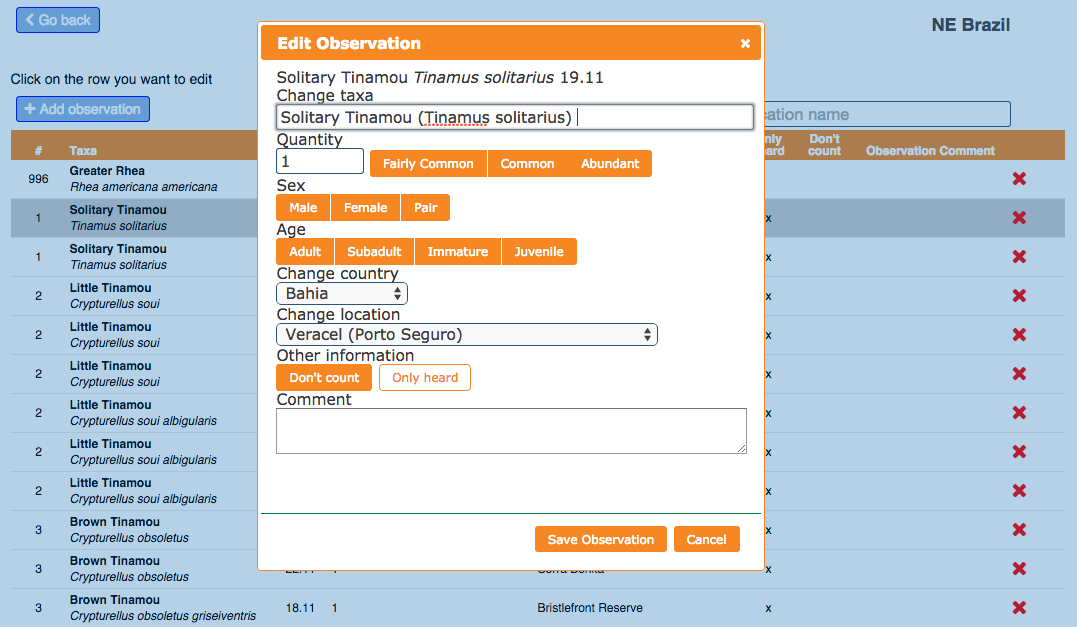
In a first step, observations with formal errors or missing mandatory information will be listed for editing. In a second step, write-ins will be synchronized automatically and then you can review all observations - in systematic and date order - and carry out any changes, additions or deletions.
Allocate Subspecies
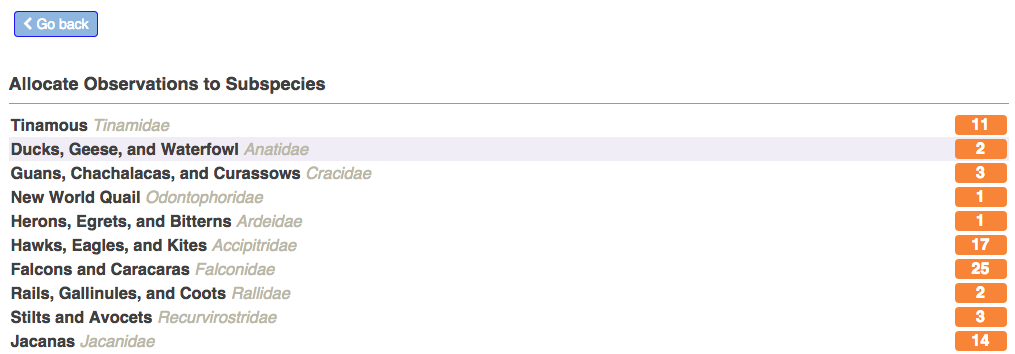
All observations of polytypic species are displayed for review and observations can be allocated to subspecies level. The TripReport is now ready and the information is saved in the database - you can now close the TripReport (making it available for participants to copy) and move on to the final step.
Finalize annotated checklist
Review the annotated report and add comments where applicable. The TripReport is then ready for download to .doc - attach it to the diary and insert photos to create a comprehensive and qualitative trip report.
